Wednesday, December 26, 2012

How To Choose The Perfect Video Game For Your Child


I realize I should have had this wonderful brainchild of an idea before the Christmas shopping season, but better late than never.

I have a 6 year old (almost 7) that loves to play video games. The problem is, many video games are too advanced for him. I don't understand why they can't put a recommended age on them or skill level on them. They have the rating system, which is good, but what developmental skills do they need to play the game? Do they need to be able to read? Are puzzles incorporated in the game? What degree of coordination do they need to play the game? I have so many games that get no play because he is incapable of playing them. Many afternoons I have been coerced into playing a game with him. Usually because it is too hard for him to play by himself. Within 10 minutes he bails on me, and before I know it I have spent all afternoon playing Super Mario Bros on the Wii!

I have bought games that I thought he would like. Nada. I have bought games that have gotten great reviews. Nope. It is really all up to your child; what they like, and whether or not their skill level is equal to the requirements of the game.

I also noticed that just because he can play one game in a genre does not mean he can play them all. For example, we have Lego Batman for Xbox. He LOVES that game, so we got Lego Star Wars. He HATES that game. Lego Pirates of the Caribbean is okay, but Lego Harry Potter for the DS requires so much reading, that he can't play a single level without constantly asking me what it says. (That was last summer, his reading level has improved and he may be able to read well enough to play it now, but he has lost the game. But I must say, during this same time, he had no problem, what so ever playing the Lego Batman game.)

My idea was born...
This idea actually needs to be credited to my 6 year old son. He got a tablet for Christmas and has been playing with it non-stop. He has also been talking non-stop about this new video game that he is wanting for his birthday (which is 3 days after Christmas). When I asked him where he heard of this video game, he told me "YouTube, Mom!" He has been watching some guy on YouTube play this video game for hours and hours!

Then it hit me! I can watch this guy play this game too, see just what this game is about, and determine if this is a game that he can play.

Here is the recipe for choosing the perfect video game that your kiddo will actually play!

1. Become familiar with game titles that you think your child would like, and you approve of.
  • go to stores and jot down titles 
  • check out online stores
    • you can search hundreds of titles quickly
2. Search for the walk-through on youtube.com
  • For the most part you should be able to just type in the title of the game in the search bar. If not add "walk-through" to the end. Just about everything is on the internet, it is very likely that whatever game you are curious about has been YouTubed!
  • I suggest you watch the walkthough first to make sure there is no bad language.
    • If you don't approve of the language, but the walk-through is a good representation of how the game will play, turn the volume down.
  • You should also be looking for skills required to play the game. Will your child be able to play the game? 
3. Have your kiddo watch the walk-through
  • If you have watched it, approve of the content, and think you child is capable of playing the game, Have your child watch it to see if he likes it.
I have tried this with several games for my kiddo. There were a few that were on a "kids game list" that I knew he would not be able to play without my help, and some that he could, but was not interested in. I can't tell you the money it ha,s and will save ey in un-played video games. We all know what the buy-back value is on those things!

Monday, December 3, 2012

More Wire Hangers Please!

 Holiday Ribbon Organization in a Pinch!

I just had an OMG I am a frigging genius moment, and I just had to post this. I am a pinterest junkie and I have never seen this on there. (Now that does not mean that it's not there...) I have seen lots of ribbon organization situations, but most are for a permanent craft room. I do not have a permanent craft room. My craft room is what ever room I am in.
Last Christmas my ribbon storage was a plastic Walmart bag, so am super excited to be moving up in the crafting organization world! Thank goodness my boyfriend dry cleans his work clothes, or I would not have had this hanger handy.


Saturday, November 17, 2012

It's been a while...

So I have to admit I took a little break after Halloween. After I finished the house, I moved on to costumes. A total of 4! Somewhere in there I made a quilt for the fall festival silent auction at the elementary school too. I will have to post some pics of all of that.
My break ended last week with the arrival of almost 40 yards of crushed velvet to be turned into 10 panels for window coverings. That really got me in gear and I whipped those out in a day and a half. Then came the announcement of the Cub Scout craft sale on December 8. Whaa? Did somebody say craft sale? That really got me going...
So I made some key chains!
Super easy, the brown is bias tape, and the rest is ribbon. I still need to make about 50 more!

While I was at the Cub Scout meeting, one of the leaders mentioned aprons. Ohh Ohh mee mee, I make aprons! Challenge accepted. I went home and started rummaging through my fabric closet. I got out all of my remnants and started making little girl aprons. They are great for remnants because they only need half a yard or so of the main fabric, and very little of the contrast. This was so much fun for me. I have a 6yr old boy. I never get to sew girl stuff. After I made the apron I asked him to try it on (to check the fit) NO WAY MOM!

Here is the first one I made.


After this one came out soo darn cute, I got super excited, (you know, the kind where you are dreaming about coordinating fabrics). I woke up the next morning and whipped out 2 more aprons.

This is what I put together in my sleep!
I think I need to dream sew more often.


After digging through all of my fabric, I found this great cherry fabric I had ordered months ago. I didn't really forget about it, it had just temporarily slipped my mind. When I ordered it, it just screamed MAKE AN APRON OUT OF ME!  But I had only ordered 1 yard of the main fabric and 1/2 yard of the contrast. I finally found a pattern that only needed 1 yard!!

Here it is!

Remember, this sew-a-thon started on Monday with 40 yards of curtains? Well, now its Friday, and I start my day with a trip to JoAnn's. I told myself all week that I was not going to buy anything for this donation, I really needed to purge my fabric closet. But then I got the greatest idea to make stockings. I needed red fabric, so I HAD to go, right????

I found my red fabric, and here are the stockings I came up with.
I used old denim for the patchwork.

I have a pic of all 4 that I made, but I am currently having technical difficulties with that picture. 
I will post it later ;)

And who would have guessed that while I was at JoAnn's, I found some really great Christmas fabric to make mother-daughter aprons? I ran out of time to make them on Friday. I was so disappointed, I have to work on Saturday and Sunday. (I can't play all of the time, gotta make some $$ to buy more fabric!) The Christmas aprons will have to wait until next week :(

I apologize for the picture quality. I will come back with some better pics on Monday.

Friday, October 5, 2012

Here It Is... Finally Done!

 Okay guys, this is what I have been working toward for the past month, and I can now say I am done! My ordinary fireplace has now been transformed for Halloween!


I carried the theme over with window treatments with tutorial and I found the netting at Dollar General for a buck!!


I had felt leftover so I made some chains to go in my yard. 
I painted some stakes that I had bought from Home Depot over the summer. They were about $6 for 24 stakes. I made chains from felt and used a staple gun to attach them to the stakes. At the Halloween stores you can buy chains, they are $6-9 for a 4 ft section. This was much cheaper, and you get the same look.

Fantastic Freebie Before and After


During one of my recent trips to the local resale shop, the clerk gave me this vase for free!! Not exactly my style, but I am never one to turn down anything free. I took it home and pondered what to do with it. Then I saw this... well I was going to put the link here of the pic I saw that inspired me, but I can't find it! I think it was Better Homes and Gardens, or Martha Stewart. (if you know, please post a link in my comments =)) 
Anyway, I was inspired, so away I went.

After I sanded i,t I painted it just like my glassware here
I added a bow of yarn with many loops.
Used more of the 30 cent flowers I found for my Unearthly Blooms Tutorial
Glued on some rats and spiders I got the Dollar Store, and done!!

Snug As A Bug Pillow Tutorial


I saw this cute pillow (below) in a JoAnn fabric store ad, and couldn't believe they actually sell a pattern for something so simple. I decided to tackle this project with no pattern, just a picture. I think mine came out quite well.
 I used remnants, so I will give you the dimensions of my cuts, not what I bought.I will also refer to them my color as opposed to A, B, or upper and lower etc. I think it will be easier to follow. 
Note: I used fleece, but flannel could be used also.


Here is what I used to make the pillow.
Purple fleece 6 3/4 x 14 3/4 inches (cut 2)
Green fleece 8 3/4 x 14 3/4 inches (cut 2)
Orange fleece 3 x 6 inches (cut 2)
                       3 x 8 inches (cut 6)
Coordinating fat quarter
Fusible interfacing 8 3/4 x 14 3/4 (cut 1) You could also use stabilizer, but this is what I had.
Heat and Bond (double sided iron on bonding for the fabric circles)
White scrap for eyes
Black scrap for eyes
Black rickrack (optional; I used a decorative stitch)

First you will make all of your fabric cuts.


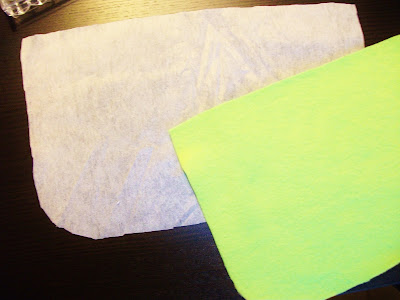
Use a small bowl to round 2 corners on the green and purple cuts.

Do the same for your iron on interfacing.

Iron the interfacing onto your one of your green cuts. This will be the front of the pillow where the appliques will go.

Now go on a hunt for circular objects for the dots. You will need 3 different sizes for the spots. You will also need a smaller circle for the iris of the eye.

 The puffy paint bottle is what I used for the x-small eye. I used the vitamins above for the white of the eye.

Okay. Stay with me here, there are two ways to do this. 

1. You can use webbing (if you do it this way, you will need to do the eyes separately)
  • iron it onto your fat quarter
  • trace the circles onto the webbing side 
    • 3 large
    • 3 medium
    • 3 small
  • cut them out 
  • iron them on the interfaced green cut
Eyes
  • follow the steps above
  • trace 2 small on white
  • 2 x-small on black


Follow package instructions for ironing you bonding on. I covered the green fleece with a pillow case because I didn't want to burn it.

Okay, here is the second way. 
  • use Heat n Bond
  • trace all of your circles (including the eyes)
    • 3 large
    • 3 medium
    • 5 small- 3 for the body and 2 for the eyes
    • 2 x-small
  • cut them out
  • iron them to your fat quarter
  • peel the paper off and iron them to your interfaced green fabric


Now you should have your circles in place, so set your sewing machine to the zig-zag stitch and adjust the stitch length and width to something you are happy with. I tested a few stitch lengths and widths on a scrap of fabric. The trick to sewing on appliques is to make sure that the little line on your foot is lined up with the edge of the circle. This will keep your zig-zag equal between the applique and the green fleece.
This isn't the greatest picture, but you can see the little line on the clear part of the foot in the middle. That should be on the edge of the circle.

My zig-zag stitch was skipping a bit. This is easy to go back and fix. Just line up the needle where the stitch is missing and do a few forward and backward stitches to fill it in. I think my tension needed tweaking.

Now for the purple face. You will need to center the eyes onto your purple fabric. This will be different for everyone, because the size of your eyes are likely different. Sew them on the same way you did the circles.

In the picture in the ad, they used rick rack for the mouth. I didn't have any, but I have a decorative stitch on my machine that is similar. 

To make the smile, I used a plate and pressed it into the purple to make a "crease" in the fabric. I did this until I was happy with the placement of the smile.

Then I traced the "crease" with a fabric marker.


 Again, keep your foot centered on the line, no matter what the stitch is doing, especially with this stitch because of the way it scallops.

It's a little crooked, but I am okay with it. Gives him character, and in the end, you will never see it.

Antennae and legs

Fold them all in half and sew down the side, and one end. Turn them inside out and turn out the corners.

I like to use a chop stick to turn them and push out the corners.
  
Tye a knot in the ends of all of them.


Sew the front purple and green cuts together using a 1/8 seam allowance. Sew the two back pieces together also.
 

Position the two antennae above the eyes and three legs on each side of the lower body. Pin them in place. Make sure your pins are at least 1/2 inch in so they don't get caught in the seam allowance.
Now with right sides of fabric together, sew the front and back of the pillow together leaving a 2-3 inch opening in the bottom of the pillow. Make sure the legs are all in place and don't get caught in your seam.
 
Now turn your pillow out. It will look a bit crazy, just keep working with it until it is all turned out.

Time to stuff!!

Use baseball sized puffs of stuffing and make sure you fill the corners. 


Hand stitch your opening shut and you are done!